Welcome to the world of homemade sour gummy candies! If you’re looking for a fun and easy project to try at home, you’ve come to the right place. Making fake sour gummies is a simple and satisfying activity that anyone can do. Not only will you have a blast creating your candy, but you’ll also impress your friends and family with your culinary skills. So, let’s get started!
- Key Takeaways:
- Learn how to make fake sour gummies at home
- Discover the necessary ingredients and equipment to get started
- Follow step-by-step instructions to create the sour gummy mixture
- Add sour flavor and extra colors to your gummies
- Store and serve your homemade sour gummies like a pro
- Troubleshoot common issues and improve your sour gummy-making skills.
Positive points
- Simple Ingredients: Requires essential items like gelatin or agar-agar, flavored liquids (juice or soda), sugar, and citric acid.
- Customization: Choose your flavors, colors, and shapes for a personalized touch.
- Variety of Shapes and Sizes: Use different molds for fun, themed gummies, ideal for parties or gifts.
- Adjustable Taste: Control the level of sweetness and sourness to your preference.
- Kid-Friendly Activity: This is an excellent way for kids to learn cooking and be creative safely.
- No Artificial Additives: A healthier option without the artificial ingredients found in commercial products.
- Perfect for Events and Gifts: Ideal for parties and as customizable, homemade gifts.
- Educational: Learn about the science behind gummy-making, like how gelatin or agar-agar works.
Negative points
Getting Started: Ingredients and Equipment
Making sour gummies at home is easy and fun, requiring only a few essential ingredients and equipment. Here’s what you’ll need:

| Ingredients | Equipment |
|---|---|
| Gelatin | Gummy molds |
| Juice or other liquids | A small saucepan |
| Citric acid or other sour flavoring | A whisk or spoon sugar |
| r or other sweeteners | A dropper or syringe (optional) |
| Food coloring (optional) |
Most of these items are at your local grocery or craft store. If you don’t have gummy molds, you can use silicone ice cube trays or even shape the mixture by hand.
Now that you have everything, it’s time to start making your delicious homemade sour gummies!
Preparing the Sour Gummy Mixture
Now that you have gathered all the ingredients and equipment for making your homemade sour gummy candies, it’s time to prepare the sour gummy mixture. Follow these simple steps for the perfect mixture:
- Begin by heating the water and gelatin mixture in a pan over medium heat, mixing occasionally. Keep stirring until the gelatin is dissolved completely.
- Next, add the sugar and continue stirring until it dissolves completely.
- Minimize the heat and let the mixture simmer for 5-7 minutes, but do not let it come to a boil.
- Remove from heat and add your desired flavor extract or juice and the citric acid or sour candy powder to the mixture. Stir well until the components are fully incorporated.
Note that citric acid should be used sparingly to ensure the correct tartness level. Taste the mixture to determine the perfect sourness level for your taste buds.
Adding Sour Flavor
Now that you have prepared the gummy mixture, it’s time to add the sour flavor. There are a few options for achieving the desired tartness:
- Citric acid: This is a popular choice for adding sourness to gummies. You can find citric acid at your local grocery store or online.
- Sour candy powders: You can also use sour candy powders, such as Sour Patch Kids or Warheads, to add sour flavor. Mix the powder with the gummy mixture before pouring it into molds.
It’s important to note that the amount of sour flavor you add will depend on your personal preference. Start with a small amount, taste the mixture, and slowly add until you reach the desired level of sourness.
Shaping and Setting the Gummies
Now that your sour gummy mixture is ready, it’s time to shape and set it. Here are some tips:
- If using silicone molds, lightly spray them with non-stick cooking spray before pouring in the mixture. This will make it easier to remove the gummies later on.
- Use a small dropper or spoon to fill each mold cavity with the mixture carefully. Avoid over-filling, as this can cause the gummies to stick together.
- For more creative shapes, you can use cookie cutters or shape the mixture by hand on a flat surface (lightly dusted with cornstarch to prevent sticking).
- Allow the gummies to set at room temperature for about 20-30 minutes. If they are still too sticky to remove from the molds, let them sit for a bit longer.
- Once the gummies are set, gently pop them out of the molds. If they are still too soft or sticky, place them in the refrigerator for a few minutes to firm up.
Experiment with different molds and shapes to make your sour gummies more fun and unique!
Adding Extra Flavor and Colors
Want to create a personalized touch to your fake sour gummies? Adding extra flavors and colors is a fun way to get creative. Here are some simple ideas to get you started:
- Consider using fruit juices such as raspberry, orange, or grapefruit to enhance the taste of your gummies.
- Extracts like vanilla, almond, and peppermint can add a new flavor to your sour gummies—a place to start with small amounts and gradually increase to suit your taste.
- For a pop of color, try adding food coloring to your mixture. Gel food coloring works pleasingly, as it is more concentrated and less likely to affect the texture of your gummies.
- Experiment with additional flavor combinations to find your perfect balance of sweet and sour. Consider adding a mixture of tart and sweet flavors to create a unique taste.
Remember to begin with small amounts and gradually add more as needed. Also, remember that too much liquid can affect the setting process, so be careful not to go overboard. Have fun with it, and let your creativity run wild!
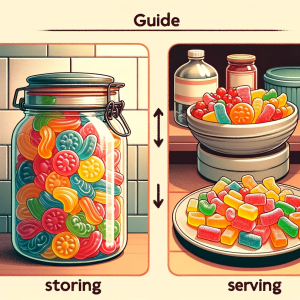
Storing and Serving the Sour Gummies
Once your homemade sour gummies are ready, it’s necessary to store them properly to maintain their freshness and ideal texture. Here are some tips to help you store and serve your gummies:

| Storage method | Recommendation |
|---|---|
| Airtight container at normal temperature storage | e for up to 1 week |
| Refrigerator | Store for up to 2 weeks |
| Freezer | Store for up to 3 months |
When serving your sour gummies, there are many creative ways to present them. You can place them in a decorative jar or bowl, create a candy buffet, or use them as toppings for cupcakes or ice cream. The possibilities are endless!
Troubleshooting and Tips
Making fake sour gummies is simple and fun, but you can encounter hiccups like any recipe. Here are some common problems and tips to help you make the best sour gummies possible:
| Problem | Solution |
|---|---|
| Gummies are too complicated or tougher | y reducing the cooking time or adding more liquid to the mixture. You can also experiment with different types of gelatin to find the perfect texture. |
| Gummies are too soft or sticky. | Increase the cooking time or add more gelatin to the mixture. You can also try letting the gummies dry out longer before storing them. |
| Gummies have a grainy texture. | Make sure to dissolve the gelatin completely in the liquid mixture before heating. You can also strain the mixture before pouring it into molds to remove lumps or grains. |
| Gummies are not sour enough. | Increase the amount of citric acid or sour candy powder in the mixture. After they have set, you can also try dusting the gummies with more citric acid. |
In addition to troubleshooting, here are some tips to help you make the most delicious and visually appealing sour gummies:
- Use high-quality components for the best flavor and texture.
- Experiment with various shapes and sizes of molds for variety.
- Try using different types of fruit juice or extracts to add a unique twist to the flavor.
- Play with different colors using food coloring or natural sources like beet powder or turmeric.
- Store the gummies in an airtight container at room temperature for up to two weeks.
With these tips and tricks, you can make delicious and eye-catching fake sour gummies at home in no time. Happy sour gummy making!
Conclusion
Making fake sour gummies at home is an enjoyable and easy DIY project that anyone can enjoy. By following these simple steps and using readily available ingredients, you can create a variety of delicious and colorful gummies with the perfect amount of sourness.
- DIY Sour Gummies:- Enjoy a fun and easy project making your sour gummies at home.
- Simple Steps:- Follow straightforward instructions using readily available ingredients.
- Variety of Flavors:- Experiment with different flavors, creating a diverse range of tasty gummies.
- Custom Shapes and Colors:- Get creative with shapes and colors, making your homemade gummies unique.
- Perfect Sourness:- Achieve the ideal balance of sourness for a delightful burst of flavor.
- Great for Any Occasion:- Whether with friends or as a solo treat, homemade sour gummies are a tasty and enjoyable solution.
Start your sweet adventure in the kitchen and craft your delightful sour gummies with this easy and rewarding DIY project!
Review Sour Gummy Fun: Easy DIY Guide for Beginners.
User: James Anderson
This guide simplifies homemade sour gummy making, perfect for beginners. It encourages creativity with common ingredients and is a fun, educational activity for kids. While achieving the right texture and flavor may take a bit of practice, the result is a healthier alternative to store-bought gummies without artificial additives. A great choice for those new to candy-making or seeking a creative kitchen project.
Rating: 4.8/5
Review: Sour Gummy-Making Adventure: Easy and Creative DIY Guide.
User: Sarah Davis
How to Make Fake Sour Gummies” is a fantastic guide for beginners and candy enthusiasts. It simplifies homemade gummy-making with easy-to-find ingredients, making it accessible and fun. You’ll love the creative freedom it offers for choosing flavors and shapes, especially if you’re doing it with kids. While getting the perfect texture and flavor might require a bit of practice, the satisfaction of a healthier, additive-free treat is worth it. It’s an enjoyable kitchen adventure waiting for you!
Rating: 4.7/5

Welcome to GummiesInfo.com, your go-to hub for all things gummy, curated by yours truly, Jimmy Chamberlin. With an unbridled passion for wellness and a relentless curiosity about gummies, I’m here to provide insightful guides that make your journey to better health both flavorful and enjoyable. My foray into health and wellness began as a mission to find practical, enjoyable ways to enhance well-being.
This odyssey led me to dive deep into the realm of gummies, exploring their benefits, ingredients, and impact on health. GummiesInfo.com stands apart through my hands-on approach. I won’t settle for superficial knowledge – I dig deep to uncover the finest gummy options. By scrutinizing ingredients, evaluating formulations, and conducting real-world tests, I’m here to guide you toward optimal choices. From gummy essentials to detailed health-specific insights like immunity, energy, and relaxation, GummiesInfo.com is your trusted companion. Join me in discovering the potential of gummies – together; we’ll journey towards wellness, one flavorful gummy at a time.
Yours in wellness,
Jimmy Chamberlin